How to Remove and Install a Compressor Manifold
TOOLS NEEDED:
• 8 mm Hex key • O-ring pick (gpd #5811493) • Always use eye protection
• 8 mm Hex key • O-ring pick (gpd #5811493) • Always use eye protection
STEP 1
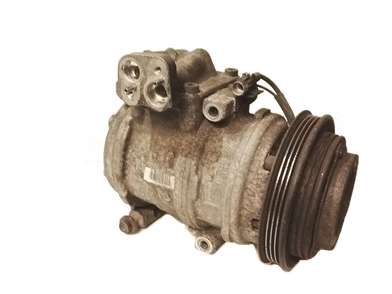
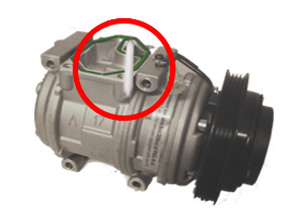
Evacuate your vehicle’s air conditioning system; remove lines; Remove compressor and locate manifold on old compressor. The manifold is usually on top of the compressor secured by 4, 8mm hex bolts. Note which way the manifold sits on the compressor. (The manifold pictured is a representation; yours may look different). Clean around manifold and remove excess
dirt before removing hex bolts.
STEP 2
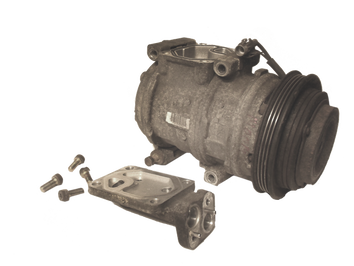
Remove 4 x 8mm bolts using caution as compressor may be under pressure. Remove manifold from old compressor taking care not to get any dirt inside manifold. If concerned, clean dirt away.
Remove 4 x 8mm bolts using caution as compressor may be under pressure. Remove manifold from old compressor taking care not to get any dirt inside manifold. If concerned, clean dirt away.
STEP 3
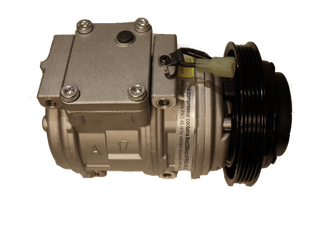
Place new compressor facing the same way as the one removed from the vehicle. Locate shipping plate on top of compressor. Undo 4 x 8mm hex bolts. Caution! Every gpd compressor is tested before leaving factory, so there is a high probability that it will be under pressure; use caution when removing plate.
Place new compressor facing the same way as the one removed from the vehicle. Locate shipping plate on top of compressor. Undo 4 x 8mm hex bolts. Caution! Every gpd compressor is tested before leaving factory, so there is a high probability that it will be under pressure; use caution when removing plate.
STEP 4
Remove shipping plate exposing center of compressor. Use caution not to get dirt inside the compressor or knock compressor over. gpd compressors come with the correct amount of oil for your vehicles air conditioning system.
Remove shipping plate exposing center of compressor. Use caution not to get dirt inside the compressor or knock compressor over. gpd compressors come with the correct amount of oil for your vehicles air conditioning system.
STEP 5
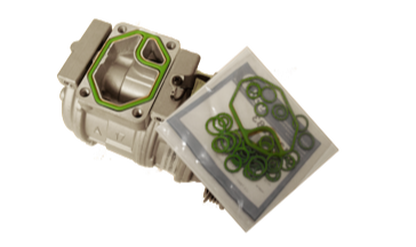
Using O-ring pick (gpd# 5811493) remove manifold gasket under shipping plate.
Using O-ring pick (gpd# 5811493) remove manifold gasket under shipping plate.
STEP 6
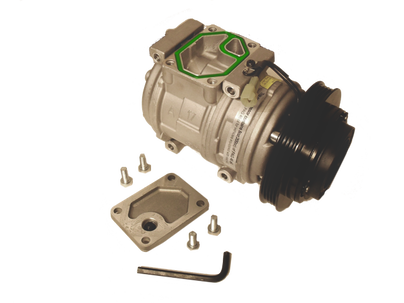
If you purchased a gpd compressor kit, it will come with a rapid seal o-ring kit. Locate the manifold gasket and place on compressor where the old one was located.
If you purchased a gpd compressor kit, it will come with a rapid seal o-ring kit. Locate the manifold gasket and place on compressor where the old one was located.
STEP 7
Place manifold from old compressor on to your new compressor and tighten. Caution! Note to make sure the manifold is in the right direction, it will fit on the compressor backwards and will have a dramatic effect on the performance of your new compressor. Ensure the manifold is put on the new compressor in the same place/location as when it was taken from the old one.
Place manifold from old compressor on to your new compressor and tighten. Caution! Note to make sure the manifold is in the right direction, it will fit on the compressor backwards and will have a dramatic effect on the performance of your new compressor. Ensure the manifold is put on the new compressor in the same place/location as when it was taken from the old one.

|

|
CLICK "DOWNLOAD FILE" FOR THE PDF VERSION
| gpd_tech_tip_43-compressor-install_remove_manifold-how_to.pdf |